Subject
- #Google Analytics
- #How to Connect Google Analytics
- #How to Register Google Analytics
- #Google Analytics Setup
Created: 2024-01-18
Created: 2024-01-18 23:09

durumis FAQ
To connect Google Analytics with durumis's statistics, Google Analyticswe'll guide you on how to set it up newly.
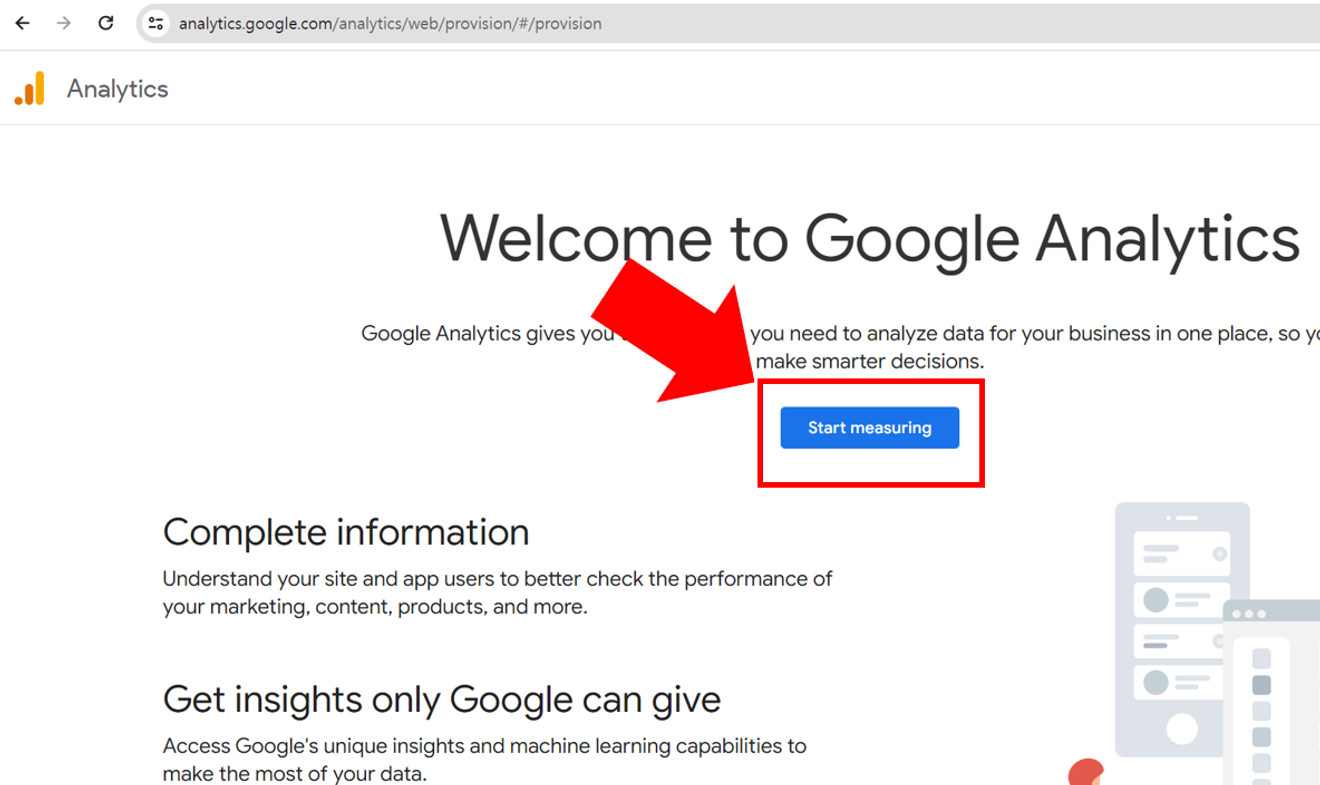
Start measuring click
Access [Google Analytics] through the link above. If you are setting it up for the first time, you need to follow all the steps below. If you already have Google Analytics, please refer to another article.
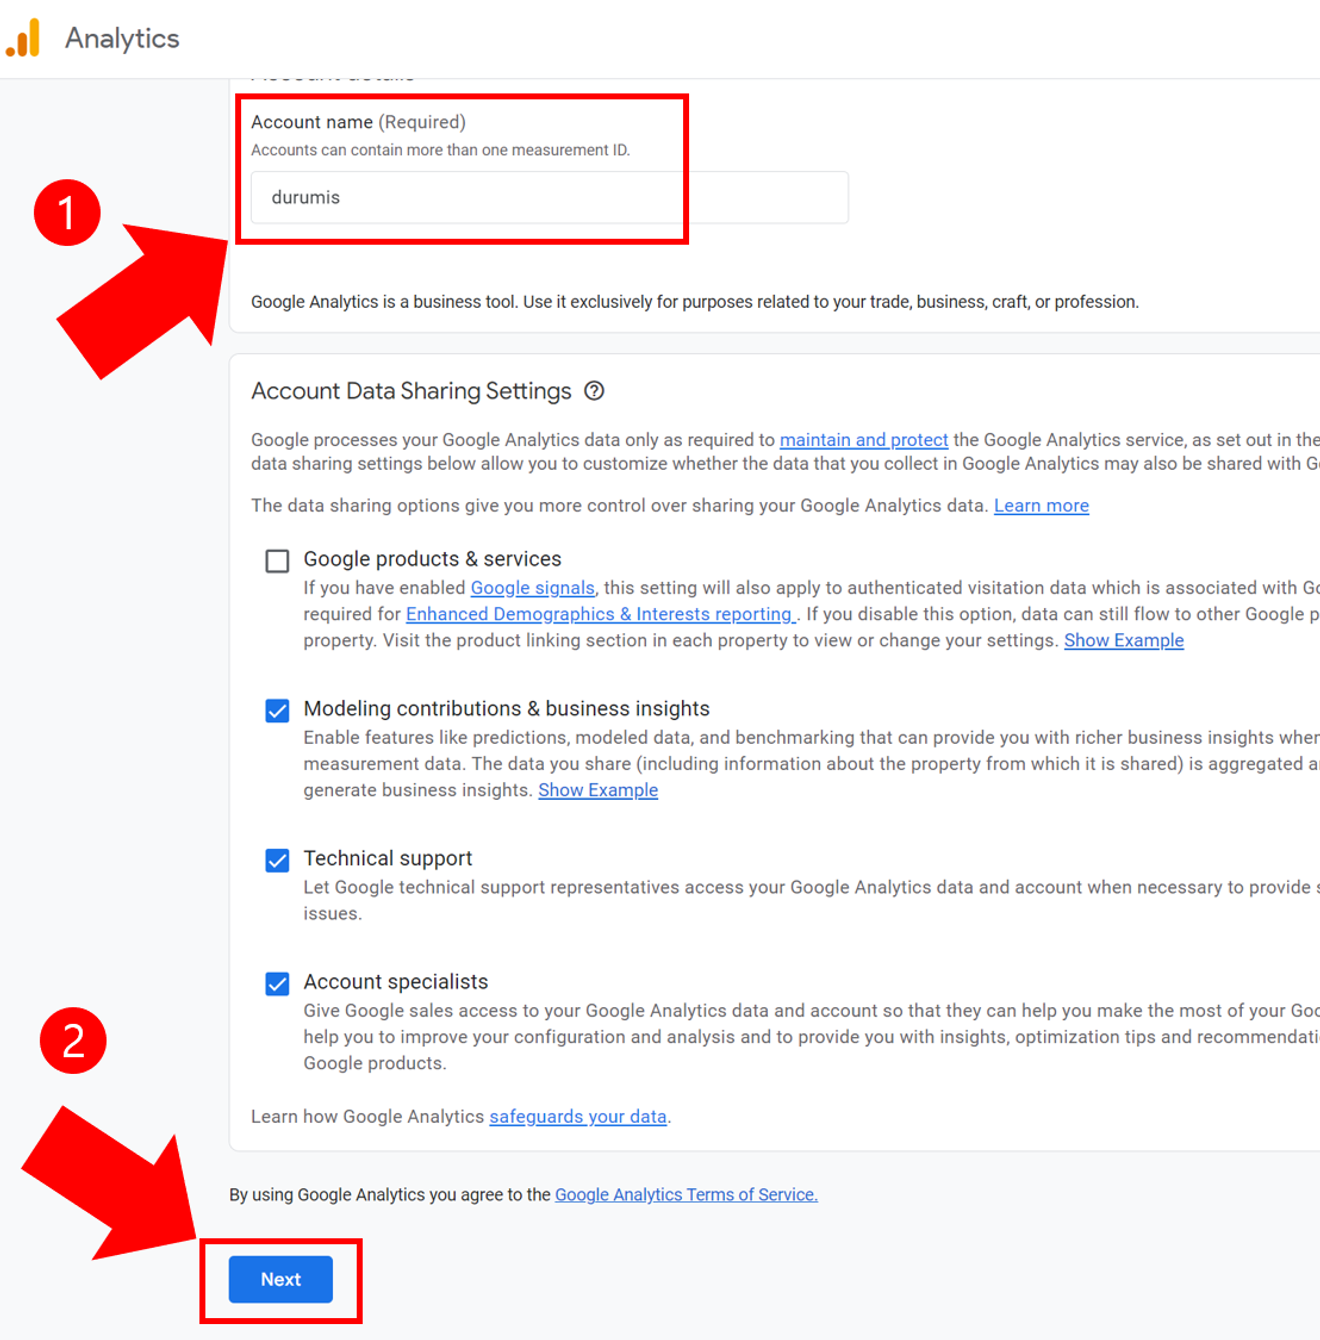
[Account Details] item
Enter the "Account Name (Required)". It's best to keep it simple and easy to understand, so you can enter 'durumis'.
There is a 'Account Data Sharing Settings' section, but you can proceed without any further settings and click [Next].
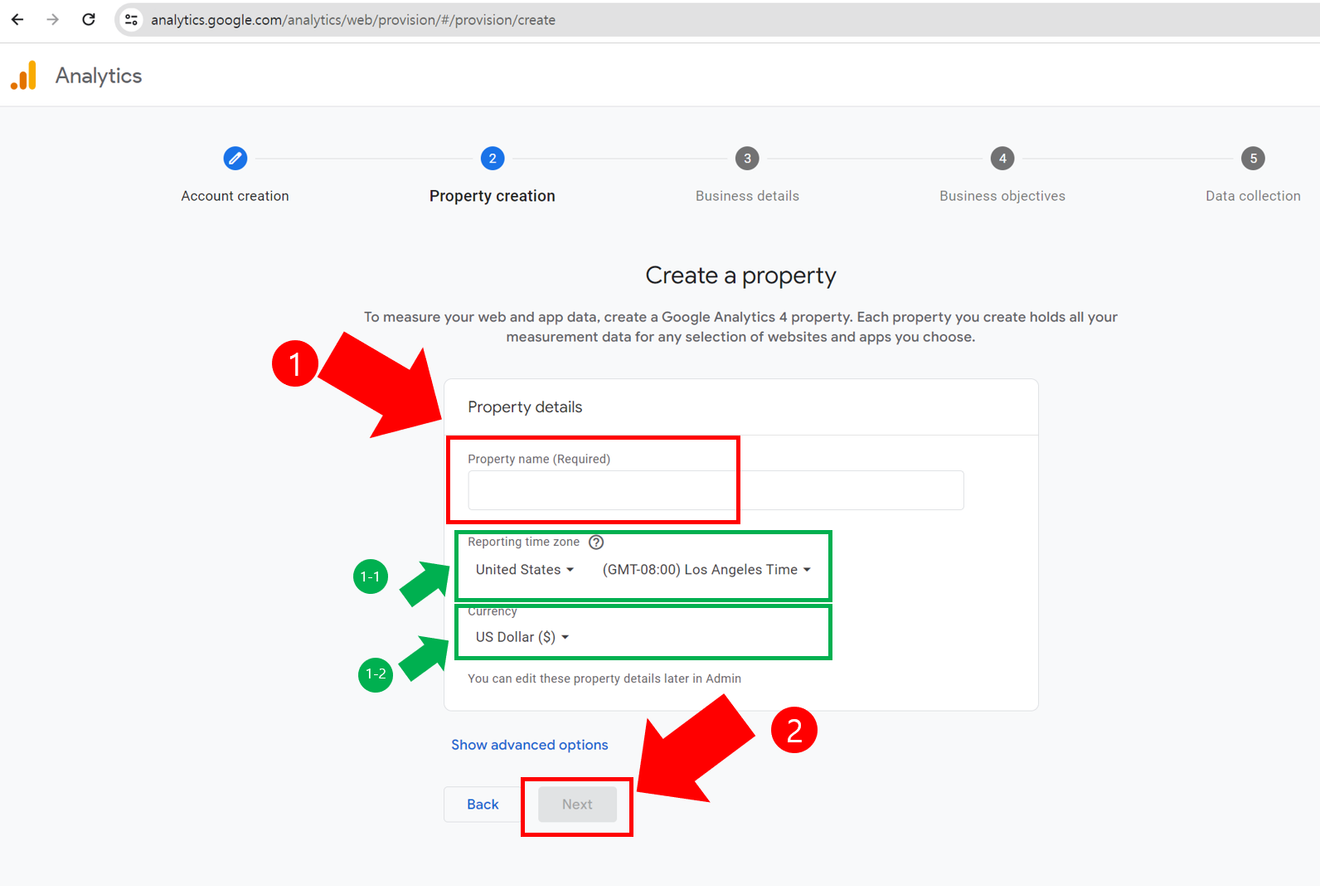
[Property Details] item
You will see an item called "Property Name (Required)".
This is about what name you want to use within the 'durumis' page to make it easy to understand.
If you plan to operate multiple blogs, it's a good idea to enter the 'blog name' or 'blog nickname'. If you only plan to operate one, you can enter 'durumis' as well. After entering the "Property Name (Required)", click [Next].
Additional Information. You can modify [Reporting Time Zone] and [Currency] according to your country. It's best to change [Reporting Time Zone] to your respective country. Then the data will be updated based on 0:00 at night.
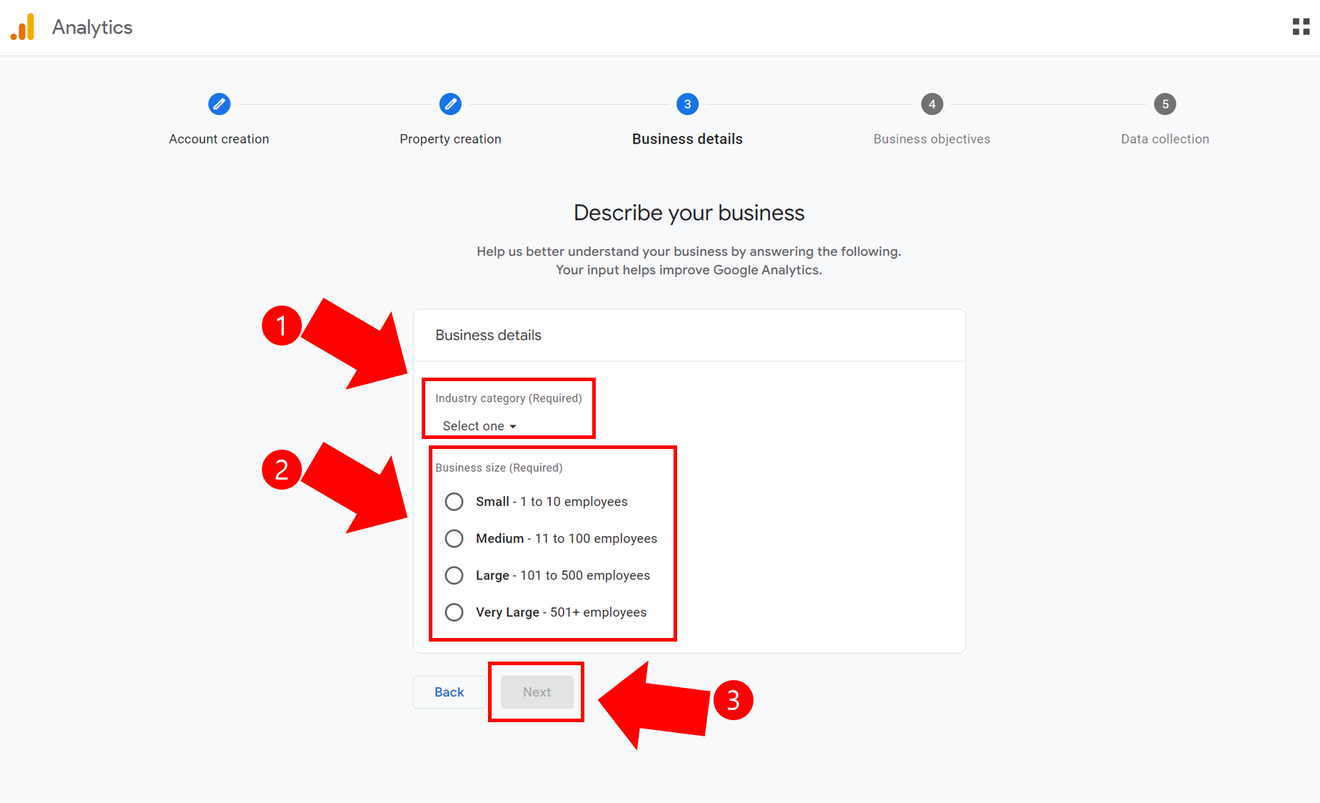
[Business Details] item
You can write anything here. For Industry, 'Internet and Telecom' is a safe choice, but you can select the industry that suits your blog. For Business Size, select the smallest option. After that, click [Next].
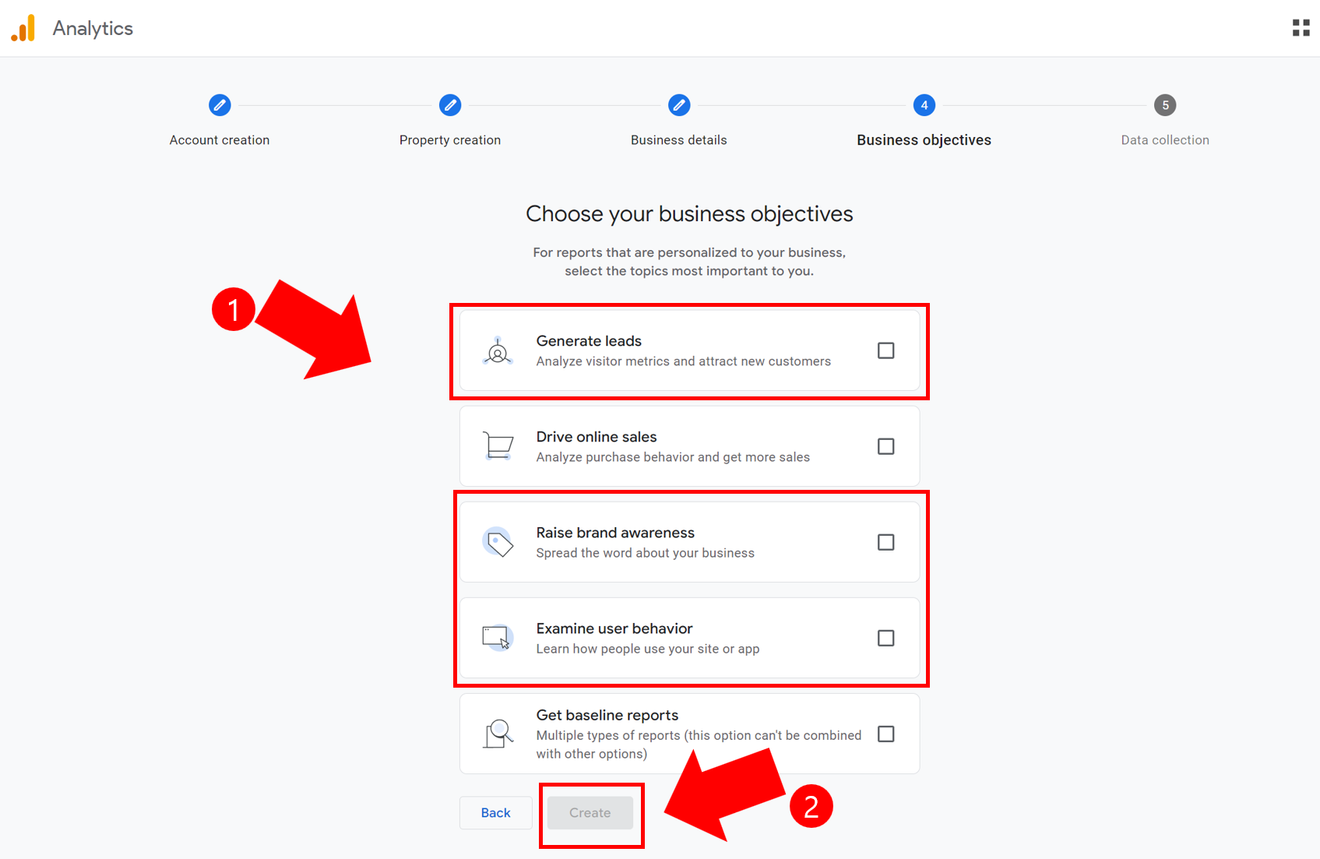
[Business Goals] item
Select "Lead Generation", "Brand Awareness Improvement", and "User Behavior Review", and click [Create]. (1, 3, 4)
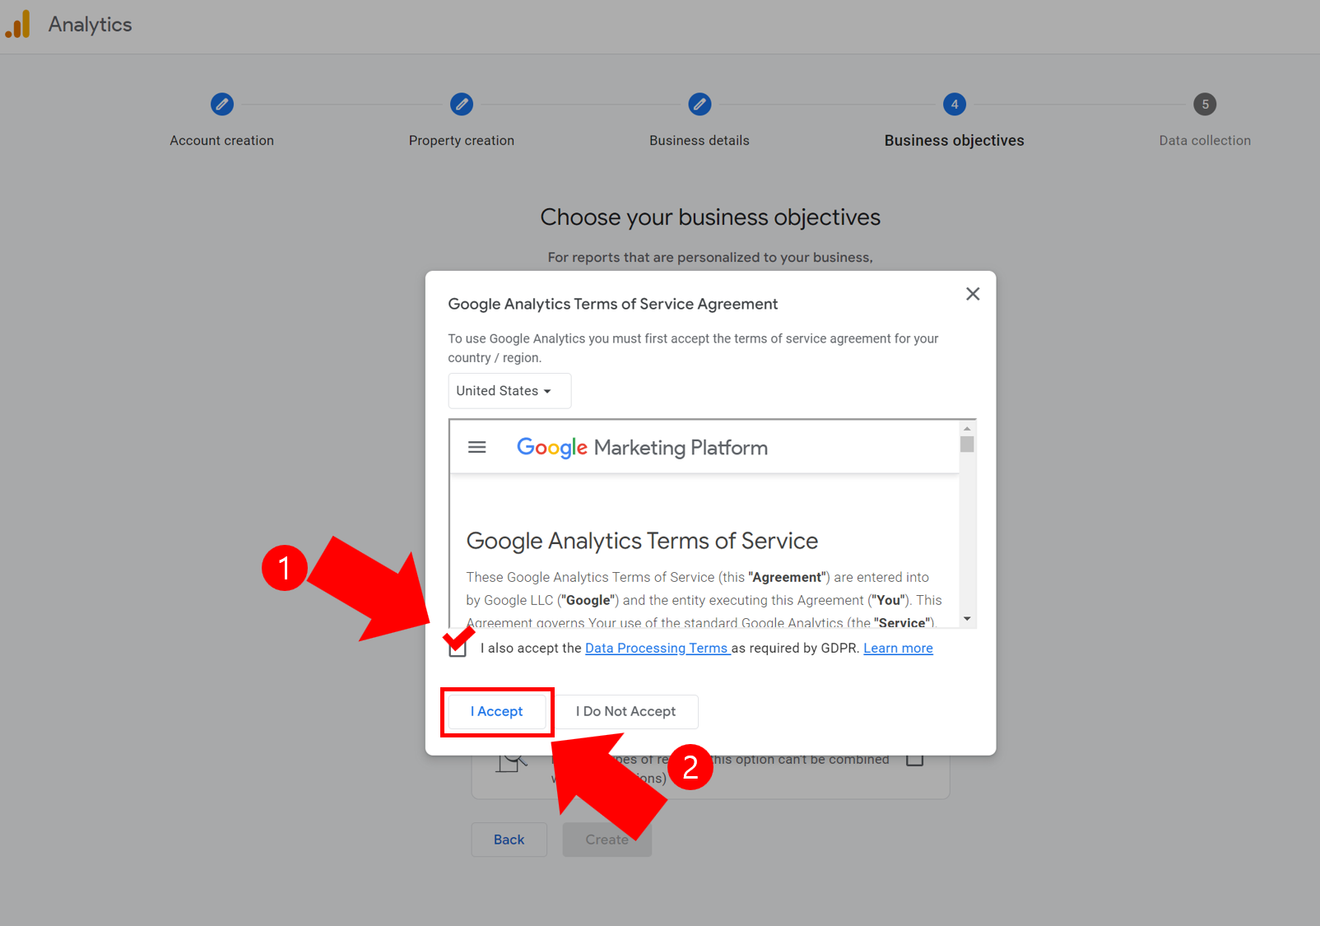
Read the terms and conditions, and if you agree, check the box and click [Agree].
Of course, if you do not agree, you cannot use it.
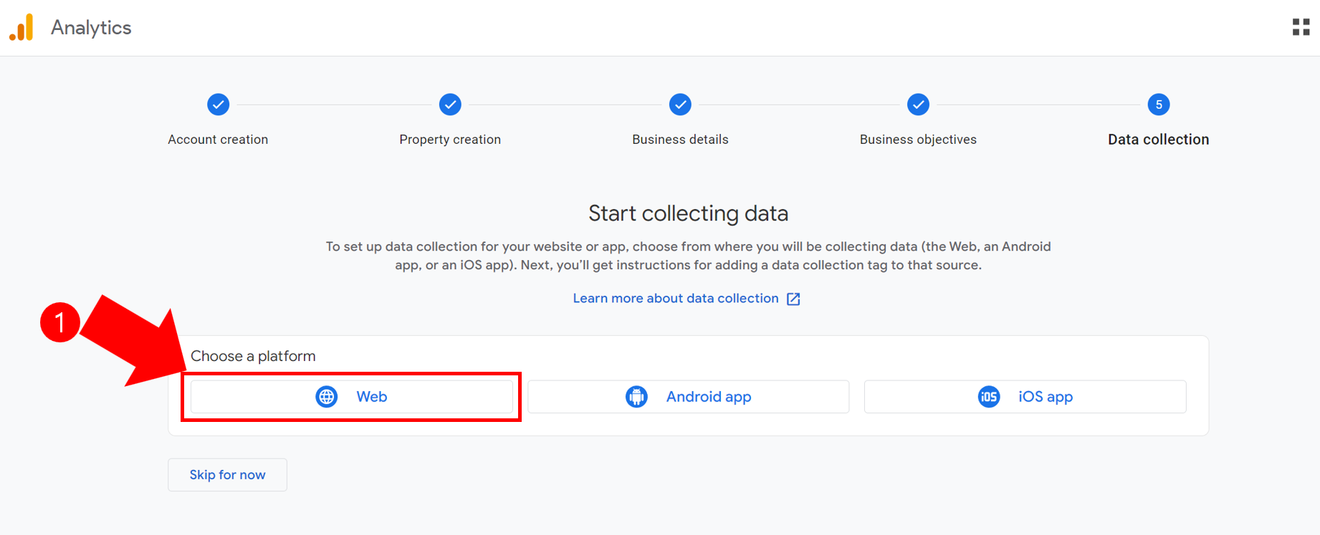
[Data Collection] item
You need to select the platform, and since we are a web service, we select [Web].
Even if an App service comes out later, you need to select [Web].

[Web Stream Setup] item
"Web Stream Settings" has a "Website URL" item where you enter "durumis.com".
You are not entering the blog home, but only the domain name precisely. For "Stream Name", enter 'durumis'.
※ Caution: Do not click [Create Stream]. Please read item 9 below carefully.

[Settings] (Gear Icon) item
Click the gear-shaped [Settings] button.
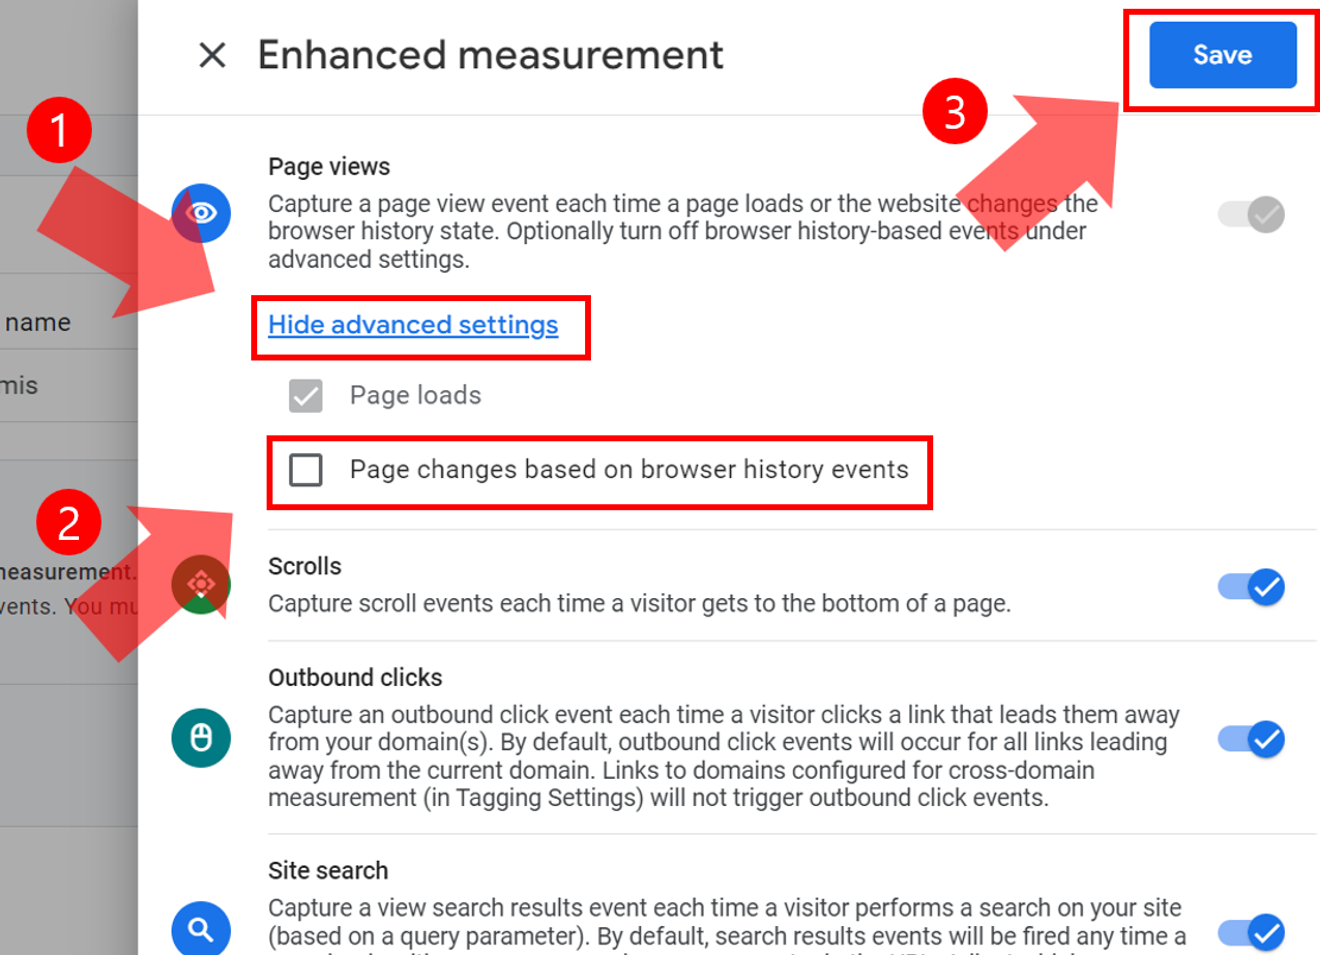
[Enhanced Measurement] item
Click [Show Advanced Settings] under [Page Views] at the top to open it.
Click the button for [Page Changes Based on Browser History Events] to uncheck it and turn it off. Then click [Save].
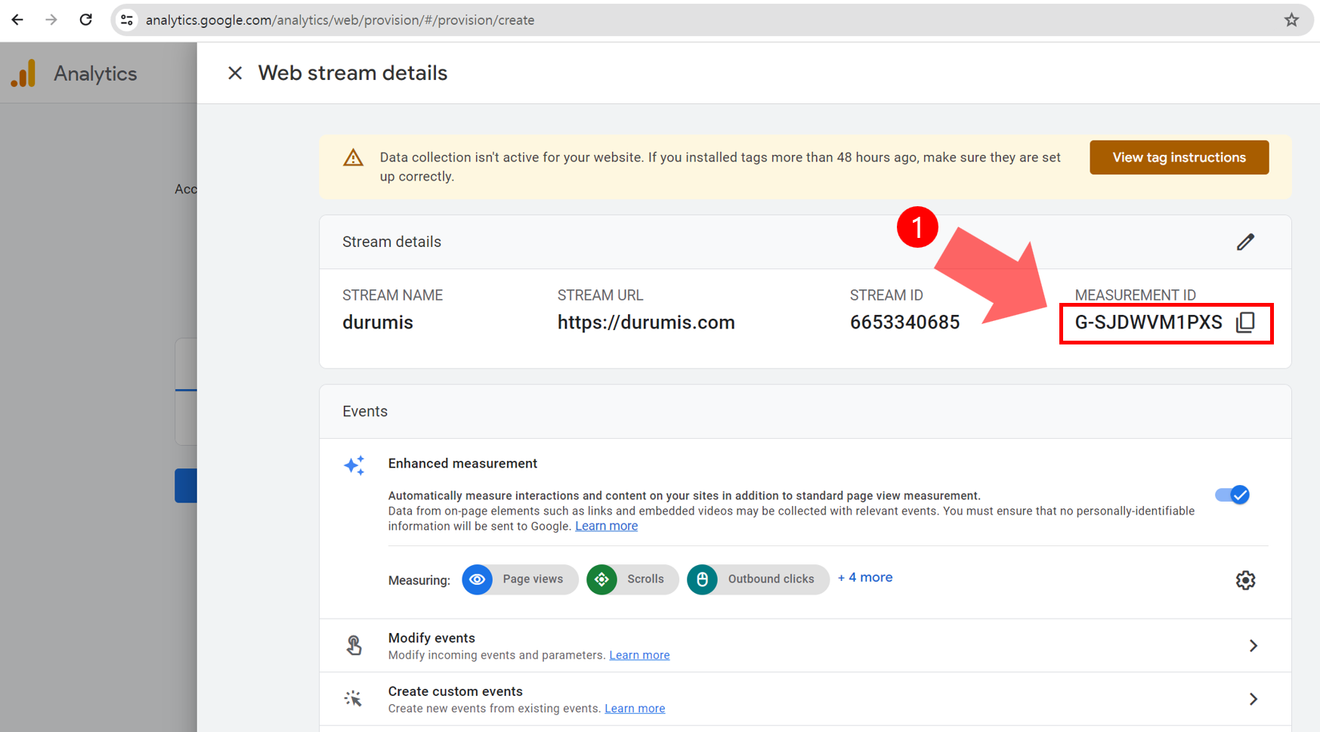
[Web Stream Details] item
Copy the ID value of [Measurement ID] located in the top right and enter it into the [Statistics] item of the 'durumis' site, excluding the 'G-'.
November 17, 2024
June 6, 2024
May 5, 2024
January 16, 2025
May 28, 2024
August 31, 2024
Comments0